Roof Repair Cost Savings | Early Detection Tips NY - LS Roofing LLC
Early Detection Saves Thousands in Roof Repair Costs

The stain appeared on a Tuesday morning. Small, barely noticeable against the bedroom ceiling. The homeowner figured it was nothing serious.
By the time we arrived three months later, that "nothing serious" had turned into $32,000 worth of damage.
This scenario plays out across upstate New York every year. Property owners wait until they see visible problems inside their homes before calling for help. But the real damage happens long before that first drip appears.
We're going to walk you through what actually happens to your roof during our harsh winters, what the warning signs look like, and why catching problems early can save you tens of thousands of dollars.
What Freeze-Thaw Cycles Do to Your Roof

When temperatures hover around freezing, your roof experiences constant expansion and contraction. Water seeps into tiny cracks during warmer periods, then freezes when temperatures drop.
Ice expands by approximately 9 percent when it freezes. That expansion acts like a wedge, prying open small cracks and lifting shingle tabs slightly with each cycle.
Upstate New York properties face similar conditions to Minnesota, which experiences an average of 86 freeze-thaw cycles between October and April. Each cycle compounds the damage from the previous one.
Around Romulus, one winter season hits asphalt shingles with temperature swings from mild fall days around 40 degrees down to single digits at night. The asphalt material relaxes and expands during warmer periods, loosening sealant strips. Then it contracts and turns brittle when temperatures plunge, creating hairline cracks around the tabs and nail lines.
The material simply can't handle 20 to 30 degree daily temperature jumps without stress.
Every warm spell melts snow and sends water into those micro-cracks. The next freeze locks it in place. The ice pushes shingle layers apart while granules on top start popping loose from repeated flexing.
By midwinter, bald spots form faster than most property owners realize. The roof deck underneath gets saturated without a single visible leak appearing inside.
Come spring thaw, the shingles try to expand again. But the damage is done. The seals are compromised and the material is fatigued. That single season of freeze-thaw has already shaved years off the roof's expected lifespan.
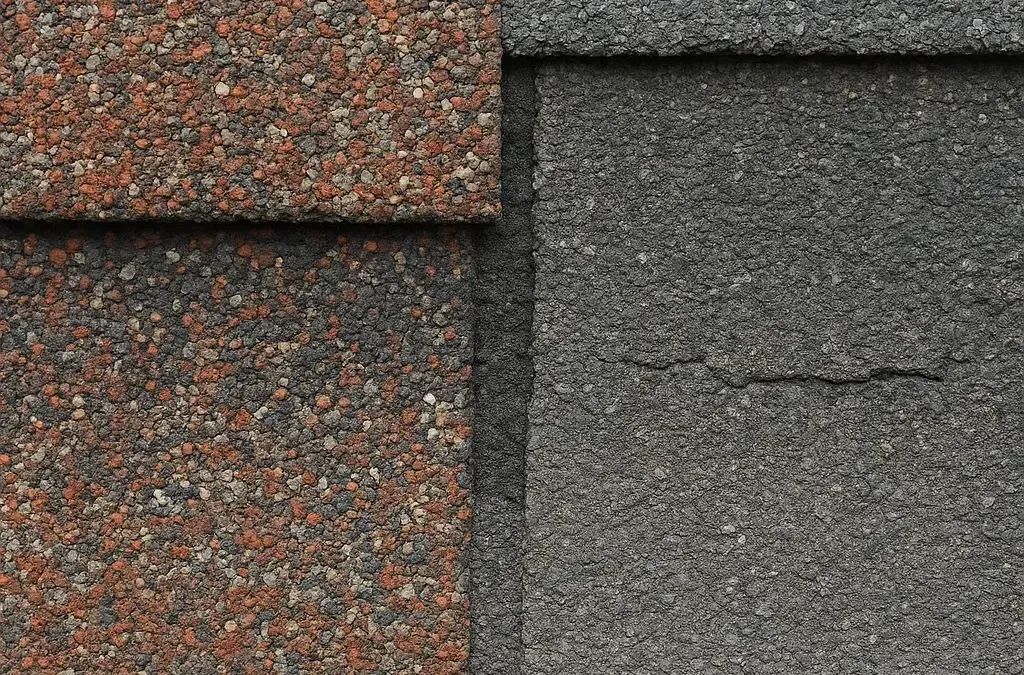
The Granule Loss Timeline
Granules protect the asphalt layer underneath from UV rays and moisture. When they're gone, deterioration accelerates dramatically.
Normal granule loss ranges from 5 to 15 percent over several years. You'll see a light dusting in gutters after heavy rain or wind. Some excess loose granules wash off in the first year or two after installation. Later, as the roof hits 10 to 15 years, natural aging causes even, minor loss across the surface.
But upstate winters accelerate this process.
Water gets into micro-cracks. Ice wedges them open. The flexing pops granules loose at a higher rate, leaving visible bald or shiny patches where black asphalt shows through.
Once you cross into 20 to 30 percent loss in localized spots, the roof's lifespan starts shortening. At 50 percent or more with widespread bald patches, the protective layer is gone. The asphalt sits exposed to UV, moisture, and more freeze-thaw cycles.
Deterioration speeds up exponentially at this stage.
Exposed asphalt softens, cracks further, and absorbs heat or water much faster. Research shows this can slash what might have been another 10 to 15 years down to just 5 to 7 years if bare areas keep growing.
Property owners often spot the problem first as color-matched grit filling their gutters. From the ground, they see dull, reflective shiny zones on the slopes. That's the signal the clock is ticking much faster toward leaks, curling tabs, or full failure.
The Real Cost of Waiting

A couple of winters back, we got called to a two-story family home on County Road 24 in Romulus. The owners had been ignoring granules piling up in their gutters, thinking it was normal wear on their 15-year-old shingles.
By the time we climbed up, the south-facing slope was covered in shiny bald patches. The protective granules had been stripped away by freeze-thaw cycles, leaving the asphalt wide open to UV and moisture.
That hidden damage had already cut what should have been another 10 to 15 years down to maybe 5 or 6 at best. The exposed areas were cracking and absorbing water like a sponge every thaw cycle.
When the big March storm hit, it finally punched through. Leaks soaked the attic insulation and ran down into the master bedroom walls.
They ended up paying $28,000 for a full tear-off shingle replacement plus another $4,000 in drywall and mold remediation.
If we'd caught it during a routine inspection the year before, we could have steered them to a metal upgrade for around $18,000 to $20,000 total with no interior mess and zero future headaches.
The wait cost them $12,000 extra plus all the stress and downtime while the family camped out in the living room for a week.
What We Look for During Inspections

When we're up on a roof doing a pre-crisis inspection, we go methodically looking for early red flags that tell us whether action is needed now or if we can safely monitor for another season.
Granule Loss Assessment
We check for bald spots or shiny, dark patches where protective granules have worn away. Light, even shedding with granules in gutters but no big exposed areas larger than a quarter or two usually means we can monitor it on roofs under 15 years old.
But widespread bald patches across multiple slopes signal immediate attention is needed. This is especially true on south-facing slopes that get more sun and freeze-thaw stress. If the asphalt looks cracked and vulnerable underneath, UV and moisture will accelerate breakdown fast.
Shingle Condition
Curled or cupped tabs along edges mean the material has lost flexibility from repeated expansion and contraction. Minor lifting on a few tabs that might reseal in warmer weather can be monitored.
Persistent curling across large sections pushes toward replacement soon. Badly buckled tabs or actual cracks splitting through multiple layers, especially near ridges or valleys where water pools, mean leaks are coming.
Flashing and Ice Dam Evidence
We inspect flashing around chimneys, vents, and skylights for cracks, separation, or rust. Any signs of ice dam evidence like lifted shingles at the eaves or dark water stains on the underside of the deck signal hidden damage from backed-up meltwater.
Overall Age and Pattern
If the roof is pushing 18 to 20 years with these combined issues, even without active leaks, the cumulative stress makes waiting another full winter risky. A younger roof with isolated minor curling and light granule scatter might buy time with ventilation improvements or spot repairs.
The line comes down to how widespread and advanced the damage is. Localized and mild means monitor closely with another check in spring. Multiple spots with exposed asphalt or structural signs means we talk seriously about upgrading before the next storm creates an expensive crisis.
The Hidden Danger of Ice Dams

Most people think ice dams are just a gutter problem. The real damage happens underneath the shingles where you can't see it.
Heat escaping from the house warms the upper part of the roof. Snow melts and runs downward. When that water reaches the colder eaves, it refreezes and creates a barrier.
As more meltwater builds up behind that barrier, it has nowhere to go. It starts seeping upward under the shingles.
Shingles are designed to shed water, not resist it moving uphill.
Once water gets underneath, it soaks into the underlayment and reaches the roof decking. This leads to wood rot, mold growth, and insulation damage inside the attic.
Those issues don't disappear when the ice melts. The moisture has already been absorbed into the structure. Over time, that trapped moisture weakens the roof system and shortens its lifespan.
Minor ice dam repairs cost an average of $900, while extensive repairs including water damage range from $1,300 to $6,200. Replacing damaged asphalt shingles can cost as much as $10,000, with more complex roofs reaching upwards of $25,000 when structural damage is included.
The Delayed Timeline Problem

Hidden moisture damage doesn't show up right away. That's what catches property owners off guard.
It can take anywhere from a few weeks to several months before you see visible signs like water stains, peeling paint, or an actual leak inside the house.
How much water got in, how well the attic is ventilated, and the materials involved all affect the timeline. Sometimes moisture sits trapped in insulation or wood decking, slowly weakening things until heavy rain or the next snowmelt cycle pushes it over the edge.
In other situations, especially if temperatures stay damp or humid, mold and mildew begin developing fairly quickly, even before obvious staining appears.
By the time you notice something inside, the issue underneath the shingles has usually been there for a while and may already be more extensive than it looks.
What Surprises Property Owners Most

When we break down the repair scope for homeowners who've just discovered a ceiling stain, the part that catches them off guard is what's happening beneath the shingles.
Most people expect a quick fix like sealing a spot or replacing a few shingles. Then we explain that water may have soaked into the decking, compromised the underlayment, and affected insulation in the attic.
What really surprises them is that you can't always see the full extent of damage until sections of the roof are opened up. This adds both complexity and cost.
The job shifts from a simple surface repair to a more involved process where multiple layers have to be addressed properly. The roof needs to be structurally sound and fully protected again, not just patched on the outside.
We've had jobs that started as what looked like a small leak around the roof edge after winter. From the outside, it appeared to be a minor shingle issue caused by ice damming.
Once we opened up that section, we found water had been sitting there for a while and had already soaked through the underlayment into the decking. The wood wasn't just damp. Parts of it were soft and starting to rot.
When we traced it further, the moisture had spread into a larger section than we originally thought. The insulation in the attic below was wet and compressed, which meant it had lost its effectiveness. There were early signs of mold starting to form.
At that point, the job shifted from a simple repair to replacing sections of decking, installing new underlayment, fixing insulation, and correcting ventilation so the same issue wouldn't happen again.
What started as maybe a quick one-day repair turned into a multi-day project. The timeline stretched from a simple fix into several days of coordinated work. Everything has to be done in the right order and properly dried out before rebuilding.
Cost-wise, it shifted from what the homeowner assumed would be a minor expense into something closer to a partial roof restoration.
The Value of Early Detection

During a routine inspection, we're looking for small warning signs like minor shingle lifting, early water intrusion, or soft spots that haven't spread yet. At that stage, the fix is typically quick, targeted, and far less expensive.
When those early signs go unnoticed, the problem keeps developing quietly beneath the surface until it reaches multiple layers. That's why property owners end up dealing with decking, insulation, and interior damage instead of just a simple repair.
Addressing an issue early keeps it contained. Waiting allows it to grow into something that takes more time, more work, and more disruption to fully fix.
A roof maintenance program should cost pennies per square foot, while an emergency repair most likely will cost hundreds of dollars per square foot. The average roof inspection costs $248, with most property owners spending between $125 and $376.
A $250 inspection might save you $10,000 in structural damage next season.
When to Schedule Inspections

In upstate New York's climate, the best approach is to time inspections around the seasons that put the most stress on the roof. This way you catch problems right when they're starting, not after they've spread.
Schedule one inspection in the spring, right after winter has done its damage. That's when issues from ice dams, freeze-thaw cycles, and heavy snow loads tend to show up.
A second check in the fall is just as important. It prepares the roof for the upcoming winter by catching loose shingles, weak spots, or ventilation issues before snow and ice make everything worse.
It's also smart to have an inspection after any major storm, especially if there were strong winds or heavy snowfall. Even small damage from a single event can turn into a bigger problem if it goes unnoticed.
Keeping to this schedule helps you stay ahead of issues while they're still small, manageable, and far less expensive to fix.
What a Thorough Inspection Includes

For property owners who've never had a professional inspection, the biggest thing to understand is that a real inspection goes far beyond someone taking a quick walk across the roof and saying everything looks fine.
A thorough inspection is a step-by-step process where we look at the entire roofing system.
We start from the exterior with shingles, flashing, vents, and problem-prone areas like valleys and edges. Then we move into the attic to check for hidden signs like moisture, mold, poor ventilation, or insulation issues.
We're not just looking for obvious damage. We're looking for early warning signs that could turn into bigger problems later, like slight shingle lifting, soft spots in the decking, or areas where water might be trying to get in.
A good inspection includes clear documentation, usually photos and explanations, so you can actually see what's going on rather than just taking someone's word for it.
What really sets a thorough inspection apart is the level of detail and the intent behind it. We're not rushing through. We're understanding how all the layers of the roof are performing together and catching small issues before they turn into costly repairs.
Protecting Your Investment

Your roof is more than shingles and nails. It's the primary defense system protecting everything underneath from upstate New York's demanding weather.
The difference between a $250 inspection and a $32,000 emergency repair comes down to timing. Catch problems when they're small and contained, or wait until they've spread through multiple layers of your roof system.
We've seen both scenarios play out hundreds of times. The property owners who schedule regular inspections avoid the stress, disruption, and massive expense of emergency repairs.
The ones who wait until they see a stain on their ceiling end up dealing with structural damage, mold remediation, and weeks of repairs.
Don't wait until a minor concern turns into a major problem. Schedule your spring or fall inspection now and get ahead of the damage before it gets ahead of you.
Contact LS Roofing NY today for your complimentary roof inspection. We'll walk you through exactly what's happening on your roof and help you make informed decisions about protecting your property.
Also Read: Low Maintenance Outdoor Living Trends
